
Herringbone Flooring Tiles:
Design and Installation Guide

herringbone tiles design and installation guide banner image
Peter Yusuf - March 10, 2025

Herringbone Tiles Vs Chevron Tiles: Are They the Same?

A lot of people confuse Herringbone patterns with Chevron. And well, it’s not that easy to separate the two.

Both these patterns create a similar V-shaped effect. However, there is a fundamental difference in the way these tiles are placed.

Placed at a 45 degree angle, the ends of Herringbone tiles overlap, producing a staggered, broken zigzag pattern that feels more traditional and textured. Chevron tiles, on the contrary, are cut at an angle so that their ends meet in a continuous, seamless V-shape, giving a more directional and modern appearance. 

Due to this key distinction, herringbone patterns are a lot more versatile. This very difference enables herringbone to blend seamlessly into both classic and contemporary interiors.

A Brief History of the Herringbone Pattern

Historically, the herringbone pattern dates back to ancient Roman roads, where stones were laid in this design to provide stability and durability.  Gradually it became a symbol of refinement, appearing in grand European palaces, aristocratic homes and high end architecture.

Even in today’s day and age, the herringbone flooring is highly sought after. Thankfully, due to advancements in technology, homeowners are able to achieve this look even in materials like ceramic, natural stone and porcelain.

With its deep-rooted history and enduring popularity, herringbone flooring is a true representation of how design can seamlessly merge tradition with modern innovation.

Why Choose Herringbone Flooring Tiles?

Some of the most impressive benefits and perks of herringbone flooring are:


Intricate Patterns

Herringbone flooring tiles are a brilliant choice for homeowners and designers looking to bring elegance, movement and  timeless appeal to their spaces.

The intricacy in this pattern adds a layer of sophistication, transforming even the simplest rooms into visually captivating interiors. 

The beauty of herringbone lies in its dynamism and texture that makes floors look richer and more architecturally considered. This is one of the key reasons why premium homes, boutique hotels and luxury commercial spaces frequently incorporate herringbone flooring.


Creates an Illusion of Space

The pattern of herringbone can even create an illusion of space. The staggered and elongate shape of herringbone allows our eyes to naturally flow along the length of the pattern which makes any room feel larger and more expansive.

When installed diagonally or in a specific direction, herringbone tiles can widen a narrow hallway, lengthen a small room or add structure to an open-plan space.

If you have a compact home or apartment and want to maximize your space, this particular pattern can be a game changer for you.


Durable and Functional

Thankfully, these tiles aren’t just pleasing for the eyes.

The durability and practicality of herringbone tiles is as impressive as its visual appeal.

Back in the way, herringbone floors were made from wood and required extensive care and maintenance. Today, with porcelain, ceramic and hybrid tiles mimicking the look of wood, homeowners can achieve the classic charm of timber without the drawbacks.  These materials are incredibly durable, water-resistant and scratch-proof, making them perfect for high-traffic areas such as kitchens, hallways and living rooms. You can use these tiles even in wet areas prone to constant moisture, areas where real wood would not be suitable.


Versatile

There is a herringbone tile to match every aesthetic preference.

Marble herringbone tiles can invite an aura of opulence with their natural veining and rich textures. This type of herringbone is perfect or a classic and luxurious ambiance.

If you want something more modern or industrial, concrete effect or dark tones herringbone tiles can add a lot of depth and character to your space.


Enhances Your Property Value

Buyers and renters are drawn to distinctive, well-designed interiors and herringbone flooring has a reputation for being a high-end feature. Homes with well-installed herringbone tiles exude a sense of sophistication and attention to detail, making them more desirable in the property market.

Because of the timelessness of this pattern, your tiles and eventually your home will remain a valuable investment for decades.


Ability to Hide Imperfections

Straight laid tiles can put focus on even the tiniest installation errors. Herringbone’s interwoven design however is forgiving when it comes to minor alignment issues.

It also helps that this pattern can hide dirt, dust and everyday wear and tear. So if you have children, pets or are too busy for regular maintenance, you can rely on the herringbone patterns.


Beautiful Balance

Finally, herringbone flooring tiles offer a perfect balance between tradition and modernity.

This pattern has been used for centuries in grand European mansions and historic buildings and continues to be a sought-after choice in contemporary interior design. The adaptability of herringbone tiles means they can complement a rustic farmhouse aesthetic just as easily as they can enhance a sleek, minimalist home.

The versatility of herringbones  make them a great fit whether you want to evoke classic charm or add a stylish twist to a modern setting.

With a perfect blend of beauty, durability, practicality and timeless appeal, herringbone flooring tiles remain an exceptional choice for anyone looking to elevate their interiors with a sophisticated yet functional flooring solution.

Popular Herringbone Flooring Tile Designs & Patterns

Herringbone flooring offers incredible versatility, with several pattern variations that can dramatically change the overall aesthetic of a space.

Traditional herringbone: This is one of the most common layouts. In this particular type of herringbone pattern, the tiles are placed at a 45 degree angle to provide a sophisticated, timeless yet subtle flooring option suitable for almost any interior style.

Double herringbone: When you pair two tiles per section instead of one, you get the intricate and dimensional effect of a double herringbone. This pattern has a more pronounced visual appeal with a sense of depth and texture, making it an excellent choice for large spaces where a bold design is desired.

90 degree herringbone: A contemporary twist on the herringbone pattern is the 90-degree herringbone, where tiles are arranged perpendicular to each other instead of at an angle. This variation gives a more structured and geometric look, making it well-suited for industrial or modern interiors.

Stacked herringbone: For those looking for a cutting-edge design, stacked herringbone provides a strikingly modern effect by aligning the tiles in a vertical or horizontal sequence rather than the traditional diagonal layout.

Choosing the Right Herringbone Tile for Your Space

Herringbone is an incredibly elegant and versatile pattern. However, there are multiple aspects you need to think about in terms of both aesthetics and functionality so you can select the absolute perfect tile for your space.

Here are few things you need to think through before choosing your tile:


The Material

Porcelain, Ceramic and Natural Stones are some of the materials that herringbone tiles come in. Each type of herringbone tile material has its own set of benefits.

Porcelain tiles have impressive durability, are water resistant and are easy to maintain. They work very well in high traffic areas such as bathrooms, hallways and kitchens. You can use these tiles in areas where moisture and daily wear are prevalent.

Ceramic tiles are slightly less durable and less expensive than Porcelains. They do work well for indoor areas though and are available in an extensive range of textures and colours.

You can invite luxury, sophistication and timeless charm with natural stone herringbone tiles.  However, this material can require more maintenance and is quite expensive. You can go for  wood like Porcelain tiles if you want the warmth of wood without the upkeep.


Tile Size

Smaller tiles create a more intricate and detailed appearance, making them ideal for compact areas such as bathroom floors, kitchen backsplashes or feature walls.

Larger tiles on the other hand can create an illusion of space while adding some drama. This particular size of tiles are perfect for open plan living areas, narrow or large hallways and dining spaces.

If you’re working with a smaller room, using long, narrow tiles in a herringbone pattern can elongate the space and make it feel larger.

For bigger spaces, large-format tiles can create a bold and modern statement, reducing grout lines for a sleek and seamless look.


Colour

Lighter tones such as white, beige, soft greys or pastels help reflect light and make a space feel more open and airy, making them an excellent choice for smaller rooms or areas with limited natural light.

Darker shades like charcoal, black, navy or deep green can add depth and drama, creating a more intimate and luxurious ambiance.

Similarly, earthy tones like terracotta, taupe and warm browns can provide a rustic or natural visual appeal.

Another creative approach is to use contrasting grout colors to emphasize the herringbone pattern—light-colored grout with dark tiles enhances the geometric effect, while a more subtle grout choice creates a softer, blended look.


Tile Finish

This is one of the aspects that can impact your space both in terms of functionality and visual appeal.

A good grip, impressive slip resistance and natural look can be achieved through matte finish tiles. You can use tiles with matte finish in outdoor areas, entryways or bathrooms.

If you want to create a luxurious and sleek feel, glossy or polishes tiles are great options. These tiles reflect light beautifully and can even make a room look bigger.

Satin-finish tiles offer a soft sheen without being overly reflective and are ideal if you want something that balances both matte and glossy finish.

Direction and Layout of the Pattern: Herringbone tiles can be laid in different orientations and the way they are positioned can affect the perception of space.

A 45 degree herringbone pattern provides a classy look, 90 degree layout if arranged perpendicularly creates an organized visual appeal . Moreover, the patterns can be adjusted to visually widen, lengthen or define different areas within a room.

Laying the herringbone pattern along the length of your room can make your space look more spacious. This works especially well if you are working with a long hallway or a narrow space.

In contrast, arranging it across the width can make a room feel wider.


Room Function and Foot Traffic

In high-traffic areas such as entryways, hallways and kitchens, it’s essential to select durable, scratch-resistant tiles that can withstand daily wear and tear.

Go for non porous and slip resistant tiles for areas like laundry rooms and bathrooms. This type of tile will ensure safety.

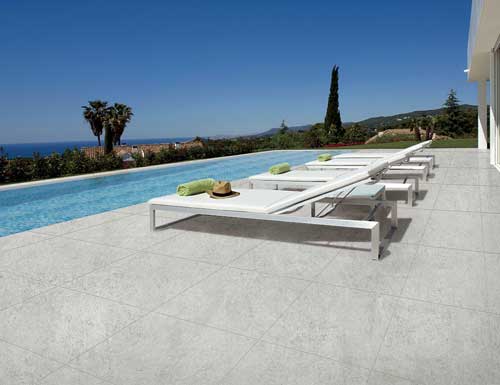
Herringbone flooring in an outdoor space such as a patio or covered terrace demands weather-resistant materials like textured porcelain or stone-look tiles that can handle exposure to the elements.


Cohesion with the Overall Design of your Home

Your herringbone tiles should complement, not compete with your existing decor.

A classic or vintage aesthetic requires warm-toned, natural materials like marble or wood-look tiles. For modern and minimalist homes, monochrome or large-format herringbone tiles with minimal grout lines create a clean and sophisticated look.

An industrial or urban aesthetic can be achieved by concrete-look herringbone tiles in grey or charcoal tones.

Step-by-Step Guide to Installing Herringbone Floor Tiles

Installing herringbone floor tiles requires careful planning, precision and patience. Unlike traditional straight-lay tiles, the intricate pattern of herringbone tiles demands meticulous measurements, precise tile placement and a well-prepared surface to ensure a flawless result. Below is a comprehensive guide to installing herringbone tiles like a professional.

Gather the Necessary Tools and Materials

Before beginning your installation project, ensure you have all the necessary materials and tools ready. The essential materials include herringbone tiles, tile adhesive, grout and a waterproof backer board or underlayment (if needed for your subfloor). For the actual installation process, the necessary tools are a notched trowel, tile spacers, tile cutter (wet saw or snap cutter), measuring tape, chalk line, level, rubber mallet, grout float and a damp sponge for cleaning off excess grout.

Choosing the right adhesive is crucial for the success of your tile installation. The adhesive must be suitable for the type of tile and the subfloor material. For porcelain and ceramic tiles, a modified thin-set mortar is the best choice because it provides a strong bond and holds the tiles firmly in place. For natural stone tiles like marble, travertine or limestone, use a white, non-staining adhesive to prevent any discoloration that may occur with darker-colored adhesives. The grout is equally important—while a matching grout color creates a seamless look, a contrasting grout color can emphasize the intricate pattern, enhancing its visual impact. Consider the overall color scheme of your room before making your grout choice.

Prepare the Subfloor for Installation

Properly preparing the subfloor is one of the most important steps in ensuring the long-term success of your herringbone tile installation. Start by thoroughly cleaning the subfloor to remove any dust, dirt, grease or other debris that could affect adhesion. Sweep and mop the surface to create a smooth, even base for the tiles. If the existing floor is uneven, you may need to level it with a self-leveling compound to avoid any irregularities. This is especially important if your subfloor is made of wood, concrete or old tile that may have settled over time.

For wood subfloors, you will need to install a cement backer board or another type of tile underlayment. This will provide a stable and moisture-resistant surface for the adhesive to bond securely. If you’re working with a concrete subfloor, ensure it is completely dry and free of cracks before applying a primer. This helps the adhesive stick properly and ensures a secure bond. Moisture can lead to tile detachment and mold growth, so address any underlying moisture problems before you start. Additionally, inspect the subfloor for stability—loose floorboards or cracks should be repaired or replaced before continuing.

Determine the Layout and Find the Center Point

The success of a herringbone installation depends heavily on the precision of your layout. The first step in the layout process is to find the center point of the room, which will act as the origin for your pattern. Use a chalk line or laser level to mark the midpoint of each wall, then snap lines to intersect at the center. This ensures the tiles will be arranged symmetrically around this center point, providing a balanced and aesthetically pleasing layout.

Dry-lay a few tiles along these centerlines to see how the pattern fits within the space. This allows you to visualize the placement before committing to the adhesive. It’s important to account for how the pattern will fall near the edges of the room. If the tiles at the edges would be very small or awkwardly shaped, consider adjusting the layout to shift the entire design slightly. This ensures that you will end up with more uniform tile cuts along the perimeter, avoiding unsightly slivers of tile and making the finished installation appear polished. Keep in mind that the herringbone pattern’s angular nature can sometimes result in complex layouts, especially in smaller or oddly shaped rooms, so don’t rush this step.

Cutting Tiles for the Herringbone Pattern

Herringbone tiles require several custom angled cuts that differ from the usual straight cuts, so careful and accurate measuring is essential. You will need to cut tiles at 45-degree angles to fit the pattern correctly. To achieve this, a wet saw is your best tool for making clean and precise cuts, especially if you are working with porcelain or ceramic tiles. A wet saw provides a steady, smooth cut without chipping, which is crucial for achieving the sharp lines required by the herringbone pattern. If you’re working with natural stone tiles, a diamond blade is necessary to make these cuts and you must be cautious as stone tiles are more fragile than ceramic options.

For straight cuts, you can use a tile snap cutter, which is especially useful for non-angled cuts. However, for any cuts where tiles need to meet at the precise 45-degree angle, only a wet saw will provide the necessary precision. It is essential to carefully measure each tile before cutting it. When cutting tiles along walls or edges, ensure the cuts are consistent, as even slight discrepancies can distort the overall design.

Applying Tile Adhesive and Setting the Tiles

Once you’ve measured and cut the necessary tiles, you’re ready to begin the installation process. Start by applying the adhesive to a small section of the floor using a notched trowel. Hold the trowel at a 45-degree angle to spread the adhesive evenly. The ridges in the adhesive create small pockets of air, ensuring that each tile will stick firmly to the subfloor. Work in manageable sections—typically 2 to 3 feet at a time—to ensure the adhesive does not dry before the tiles are placed.

Begin laying the first tiles at the center point and work outward. To achieve the herringbone effect, align each tile at a 90-degree angle to the adjacent tile. Make sure to press each tile down firmly into the adhesive to secure it in place. A rubber mallet can help gently tap the tiles to ensure full contact with the adhesive and avoid air pockets beneath the tiles.

As you proceed, use tile spacers to maintain even grout lines between tiles. The size of the spacer will depend on the width of the grout lines you desire, but most herringbone patterns use spacers between 1/16-inch and 1/8-inch wide. Periodically check the alignment of the tiles with a level or a straightedge to ensure that the tiles are being installed evenly and in line with the pattern. Herringbone tiling is known for its complexity, so staying organized and following the layout lines carefully will prevent mistakes as you move through the installation process.

Cutting and Installing Edge and Border Tiles

After finishing the central section of the floor, it’s time to turn your attention to the edge and border tiles. These tiles will require more precise cutting, as they must fit around walls, doorways and corners. To do this, measure each edge carefully to determine the size and shape of the tile that needs to be cut.

Use the wet saw to cut the tiles to the required size, ensuring that each tile fits neatly against the wall while maintaining the herringbone pattern. In some cases, you may need to make angled cuts to create a smooth transition from the central tiles to the walls. Be sure to keep the same spacing between the tiles along the edges to maintain a consistent look. If the edges of the tiles are too small or awkwardly shaped, adjust the layout in the central area of the room to create a more uniform tile size along the perimeter.

Allowing the Adhesive to Set and Preparing for Grouting

Once all the tiles are laid, you’ll need to allow the adhesive to cure for 24 hours before moving forward with grouting. This step is essential to ensure that the tiles are properly bonded to the subfloor and won’t shift or move while grouting. Avoid walking on the tiles during this time to prevent disturbing the adhesive or shifting the tiles out of alignment.

Before you start grouting, remove any tile spacers and clean off any excess adhesive using a damp cloth or sponge. This will prevent dried adhesive from interfering with the grout application and ensure that your grout lines remain clear and clean. It’s also helpful to go over the surface with a vacuum to remove dust and debris, which could cause imperfections in the grout.

Grouting the Herringbone Tiles

Once the adhesive has cured, you can begin the grouting process. Mix the grout according to the manufacturer’s instructions. Using a rubber grout float, spread the grout across the tiles at a 45-degree angle, pressing it firmly into the joints between the tiles. Be sure to work in small sections so the grout does not dry out before you can clean it off.

Once the grout is applied, remove the excess grout using the float, scraping it off diagonally to ensure the grout stays in the joints and does not cover the surface of the tiles. Afterward, use a damp sponge to gently wipe away the remaining grout haze. Rinse the sponge frequently and be careful not to pull grout out from between the tiles.

After the grout has set, usually after about 24 hours, clean the tiles again using a tile cleaner to remove any remaining haze.

Cleaning and Sealing the Tiles

After the grout has completely set, perform a final cleaning of the tiles with a pH-neutral cleaner to remove any dust or grout residue. For natural stone or porous tiles, it’s highly recommended to apply a sealer to protect the tiles and grout from moisture and stains. Sealing the tiles also helps preserve the natural color and texture, especially for more delicate materials like marble or limestone.

Tile sealing will not only enhance the tiles’ appearance but also make cleaning easier in the long term. Once the tiles and grout have dried, perform regular maintenance by sweeping or vacuuming up debris and mopping with a mild detergent.

Final Inspection and Enjoying Your New Floor

Before moving furniture back into the room, conduct a final inspection of the installation. Check for any uneven tiles, loose grout or areas that might need touch-ups. If necessary, address any issues before fully using the floor. Once the floor is set, enjoy the beautiful new herringbone tile floor you’ve installed! This classic yet dynamic pattern brings elegance and timeless appeal to any space.

Peter Yusuf - Royal Tiles

Peter Yusuf

linkedin

Peter Yusuf is a seasoned Sales and Business Development Manager at Royal Tiles in Sydney, Australia, with a proven track record of success in the global architectural and interior design sectors. With over a decade of experience, he possesses a rich understanding of tile selection and design that has helped countless clients transform their spaces. Peter's expertise spans a wide array of materials and styles, positioning him as a trusted authority in the tile industry.

You May Also Like

March 04, 2025

Why do some tiled floors stay perfectly intact for years while others shift, crack or loosen over time? 

The secret lies beneath the tiles!

Tile underlay is not really the most glamorous part of a renovation, but it has an important role in making sure your final result is flawless and long lasting. 

Whether you are tackling a DIY tiling project or going for a professional installation, by getting well informed about tile underlay, you can avoid costly repairs while ensuring a durable tile installation.

March 05, 2025

If you are looking for something to seal the gaps and joints in tiled surfaces, silicone sealants are your best bet. 

Silicone provides excellent flexibility and waterproofing in areas that are prone to moisture. However, silicone also undergoes deterioration and discolouration over time. Even molds can grow in them. 

If you need to deal with stained, old or excess silicone on your tiles, we will be talking about everything you need to know in this blog.

February 19, 2025

Natural stones are one of the most elegant and exquisite tiles out there. 

But let’s be honest. These tiles aren’t as easy to the pockets as they are to the eyes.

Thankfully, stone look tiles exist!

A revolutionary flooring and walling option, stone look tiles replicate the beauty and texture of natural stones perfectly while being budget friendly. And the best part is – these tiles even have some additional practical perks that makes them a more tempting choice!

Call Now